|
Guide
to laboratory work
 Your
notebook will
become a record of all you have seen and done in the lab. You should use
the worksheets and blank drawing pages to develop your observational
skills. In addition to quick sketches of animal form, you can pose questions, create cartoon diagrams of how things work, make “blow-up” sketches that show details, and record collection information
and page numbers for further reading. Try to create drawings and notes that
will be not only interpretable but helpful five or ten years from now. Your
notebook will
become a record of all you have seen and done in the lab. You should use
the worksheets and blank drawing pages to develop your observational
skills. In addition to quick sketches of animal form, you can pose questions, create cartoon diagrams of how things work, make “blow-up” sketches that show details, and record collection information
and page numbers for further reading. Try to create drawings and notes that
will be not only interpretable but helpful five or ten years from now.
Drawing
as an aid to observation. You don't need great artistic skills to make
useful drawings (see the informative but highly non-artistic drawings done by
the late Donald P. Abbott in his book, Observing Marine Invertebrates).
In light of digital photography, it may seem pointless to labor over drawings
and seek out details that have been described countless times. But remember:
the process of taking a photograph does not aid your learning like the process of
drawing. Your
observations and their representation on paper are part of a learning process
that forces you to pay attention to
how individual parts relate to one another and how they differ from one organism
to the next. If focused, your
brain can see and store more useful information than does taking a detailed
and more "accurate" photograph.
Useful tools:
pencil; good eraser; colored pencils (but use sparingly); drawing paper; dissection
tools. A sense of scale when looking through a microscope with different
size objectives. A textbook for
reference.
Suggestions for
what to include in your drawings:
-
Make your sketches large to
accommodate parts and labels. It is often better to do a highly simplified
sketch or outline of an animal and then “magnify” details of anatomy in
smaller blow-up sketches, especially when parts are repeated.
Don't waste your time drawing the same part over and over again, if you
won't learn anything from doing so.
-
Sketch in pencil with a light
hand to make erasing easier. Use color sparingly and only to
provide information.
-
Label profusely with
relevant information, including the phylum/class/species name, the names of
structures, collection information, and page numbers of reference material.
-
Pepper your sketches with little
notes and questions about the function of structures, speculations,
comparisons to other organisms, habitat and lifestyle descriptions, and
results of simple experiments. Try ultimately to record answers to any
questions.
-
Include a size scale
wherever possible by using a scale bar or writing down the size of the
organism or structure.
-
Draw only what you see, not
what a photograph or drawing suggests you should have seen.
 Resources.
Use your textbook and other published sources to help understand what
you see; in turn, use your laboratory experience as inspiration for further
reading. Refrain from reading more than necessary in lab, but mark passages to read
in greater detail later. Collaborate with peers--show them discoveries, ask
them questions, and together seek out answers. Make use of your instructors as
well, but also try to become comfortable with seeking out information from your
textbook and other references housed in the lab. An important part of your
training as a scientist is to come to conclusions based on the information
available. Resources.
Use your textbook and other published sources to help understand what
you see; in turn, use your laboratory experience as inspiration for further
reading. Refrain from reading more than necessary in lab, but mark passages to read
in greater detail later. Collaborate with peers--show them discoveries, ask
them questions, and together seek out answers. Make use of your instructors as
well, but also try to become comfortable with seeking out information from your
textbook and other references housed in the lab. An important part of your
training as a scientist is to come to conclusions based on the information
available.
Etiquette:
Return material to the place where others expect to find it. Keep your own
space clean, leave common spaces cleaner than you found them, and take good care
of the microscopes, which rust easily around salt water. Reserve the last 5-10
min for cleaning everything you used. Return everything to the
condition and location where
you found it at the start of the lab period.
Microscopes.
You will use microscopes often in this lab. Many invertebrates are, or have
parts that are, too small to see well without magnification. You will use two
types, Dissection and Compound microscopes:
|
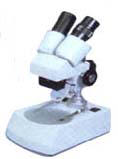 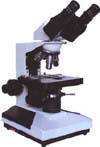
Dissection
Compound |
Microscopes are expensive and
must last a long time. Keep these basic rules in mind for most
effective use:
1. Carry
scopes with two hands.
2. For
the best 3D view, focus
first through the eyepiece without a manual adjustment and then adjust the
other eyepiece focus.
3. Scopes
rust easily, so keep
them from getting wet, especially with saltwater.
4. Turn
the scopes off when not in use (specimens are easily cooked by the
light).
5. To
clean microscope lenses use
only moistened lens paper—ask an instructor for help. |
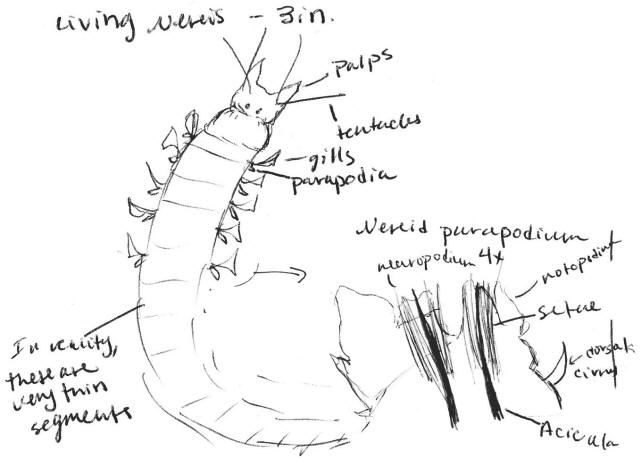
Below is an example
of a good scientific drawing. It was done by a former student in the class.
Dorsal view of Nereis
virens, with blow-up view of parapodium
 Helpful hint: To
avoid crushing delicate specimens when you prepare a slide wet-mount, try
propping the cover slip up over the specimen by putting a nick of clay on each
corner of the cover slip. Ask your instructor for help. Helpful hint: To
avoid crushing delicate specimens when you prepare a slide wet-mount, try
propping the cover slip up over the specimen by putting a nick of clay on each
corner of the cover slip. Ask your instructor for help.
|